Making POP3 & SMTP Server work with windows server 2008
Servisan_Rumahan
5:43 pm
0
A) Installing the SMTP feature that is available (optionally) in win2k8 server
1. Open up your “Server Manager” and go to “Features”
2. Click on “Add Features”
3. Select “SMTP Feature” (Already installed in my next screenshot)
4. Click install and follow the steps (this might take a while)
5. To manage your SMTP Server you can go to IIS 6.0 6.
Make sure it is started If you encounter problems later like “Unable to relay” you can fix this by going to IIS6.0
1. Go to the properties of your SMTP Virtual Server
2. Go to Access > Relay…
3. Select “All except the list below”
B) Installing the POP3 Extender from Visendo
1. Install the installer found here: http://weblogs.asp.net/hpreishuber/archive/2008/04/30/visendo-smtp-pop3-extender-for-windows-2008-server.aspx
- note: next steps are copied from the blogpost above, I’ll just add some comments between the lines
2. Move "visendosmtpextender_sample.config" from "C:\Program Files\ppedv\visendosmtpextender" to "C:\Documents and Settings\All Users\Application Data\ppedv\visendosmtpextender"
- To easily get to this path just copy it and paste it in Start > Run. Otherwise if you go looking for c:\documents and settings (or just type this in) you might get an Access Denied error
3. Rename to "visendosmtpextender_sample.config" to "visendosmtpextender.config"
4. Edit "visendosmtpextender.config"
- To give you an idea, my config looks like this: This will create a mailbox for administrator@moss.localhost, adjust to your own needs
5. Start service "Visendo SMTP Extender Service 2008"
C) Configuring outlook
1. Go to Tools > Account Settings
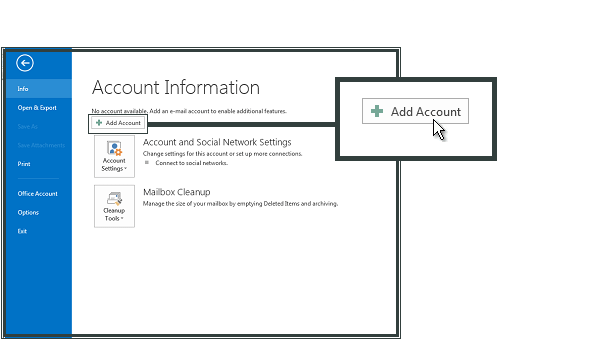
2. Create a new account
3. Select manually configure server settings or additional server types > Next > Internet E-mail > Next
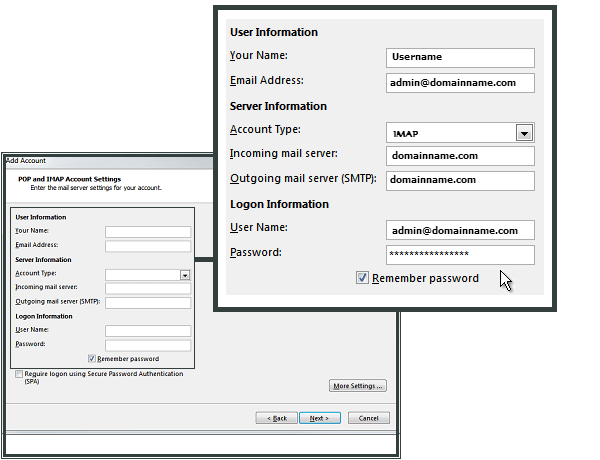
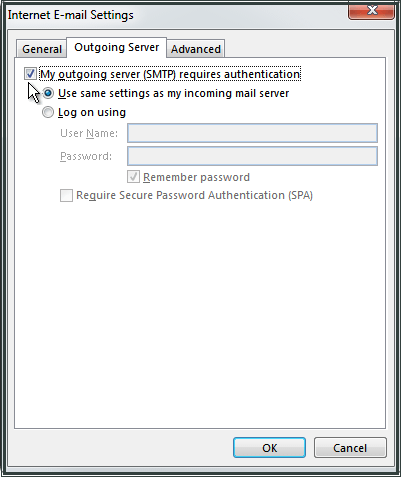
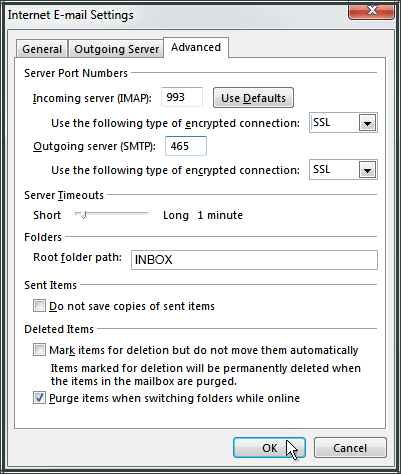
4. Fill in the following settings - Note: I have set my IP to 192.168.1.1 because that’s the way I set it in my VPC
5. Test your settings by clicking “Test Settings” Everything should complete correctly Possible issues:
- Your mails are staying put in c:/inetpub/mailroot/queue Solution: Define aliases for your hostnames in IIS6.0 SMTP Virtual Server like this:


